WELCOME

Welcome to my Blog.......The best tips on net for tennis. Click here, if VISITING FOR THE FIRST TIME.
Also dont forget to visit my new website WWW.BHARATVERMA.IN


Support Us

Showing posts with label Universal. Show all posts

Thursday, June 14, 2007

The Forehand of Roger Federer

A full shoulder turn, good balance, and tremendous racquet-head speed make this a much-feared weapon.

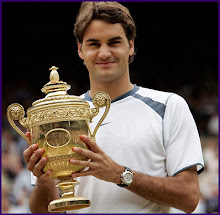
As the Wimbledon approaches near, let us take a look at the 3 time champion Roger Federer. On the list of all-time great forehands, Roger Federer’s should be near the top. It’s struck powerfully and has remarkable variety and adaptability. Of all the shots in his arsenal, it’s his forehand that he relies on most to win points. Whether he’s defending or attacking—as he’s doing in this sequence—Federer makes it all look effortless.

Roger Federer


1. Federer is turning his shoulders as he’s moving to the ball. Notice how his left hand is on the racquet even though he’s well into his preparation. This forces him to turn his shoulders. Federer uses a semi-Western grip and he’s bringing his racquet back with the head cocked above the wrist. This will ensure a loop back-swing and good spin production. He’s moving diagonally forward, rather than straight to the side, so the ball doesn’t get away from him.

2. Federer brings his racquet back and his left hand comes off the throat but stays to his right side. That’s a big change from my day, when players such as Chris Evert had their non-dominant hand out front and pointing to the oncoming ball at this stage. Keeping your off hand on the same side as your racquet produces a fuller shoulder turn, which helps you get more racquet-head speed and a more powerful shot.

Roger Federer


3. After taking a big stride to reach this point, Federer is now calculating the distance of his next step so the ball will be at the perfect point for contact. Although he’s preparing to hit a low ball, he’s taken his racquet back quite high. Federer’s left arm remains to the right side, still assisting in his shoulder turn. In this frame and the next one his rotation is so complete that you can see much of his back.

4. Federer is lowering his body with his legs (not bending at the waist) and starting to bring his racquet down. Notice how the racquet face is closed (the strings are facing down). This is due in part to his grip, but also because of the way he leads his backswing with his elbow, pronating his forearm. This type of take-back—another big change from the straight-back, straight-forward forehand of my day—allows you to produce tremendous racquet-head speed.

Roger Federer

5. As he starts his forward swing, Federer begins to open his torso and bring his left arm around to the front of his body. The string bed is still facing the ground. The oncoming ball is low—you can tell because he’s looking down—but his head has barely moved throughout the sequence. Federer follows the ball by moving his eyes while keeping his head as still as possible.

6. Federer has opened up completely at this point and his body is facing his target. His racquet has come forward with tremendous speed and he’ll make contact at a point that’s even with his right foot. Notice how he keeps his left hand close to his body. Just as figure skaters pull their arms close to spin faster, Federer tucks in his left arm to help his upper body turn more quickly and to get more racquet-head speed. Here we also get a good look at his semi-Western grip.

Roger Federer

7. Though he’s well past striking the ball, Federer’s eyes are still glued to the point of contact. This is one of the reasons Federer makes such consistent contact on his shots. His follow-through, which is to the side rather than extended out front, shows just how important rotation is in his forehand. In my era, ground strokes were more linear—straight back and straight forward.

8. The ball has been directed down the line and Federer is moving back toward the center of the court, probably with the intention of following this shot to the net if it isn’t an outright winner. He’s fi nished his forehand while maintaining his balance, which will allow him to make a smooth transition forward.

Tuesday, January 16, 2007

Lessons from Isaac Newton

Learning from Isaac Newton
A split-step keeps you in continuous motion during a rally.


You may have done your best to forget high school physics class, but perhaps you remember one of the key physicists, Isaac Newton, and the three laws that were named after him. What do they have to do with your tennis game, you ask? Everything. When it comes to mastering important concepts and understanding your coach’s advice, many players grasp them better once they know the science behind it. So for the more cerebral players out there, this one’s for you.

BEGINNER

OBJECTIVE 1: Perform a split-step
Newton’s first law states that objects in motion tend to stay in motion, and objects at rest tend to stay at rest unless acted upon by an outside force. So if you’re flatfooted on court—an object at rest—it takes more effort and time to get moving and into position to return the shot. If, on the other hand, you perform a split-step (a small hop where you land on the balls of both feet) as your opponent makes contact with the ball, you’re an object in motion. This means you’ve already overcome your inertia and therefore can move to the ball faster. That’s why you always see good players do a split-step right before their opponentsmake contact with the ball.


OBJECTIVE 2: Strengthen your leg muscles
Stopping and changing direction— overcoming the inertia of your body in motion— takes a tremendous amount of leg strength, and the more powerful your legs are, the more agile you’ll be. Plus, you’re less likely to get injured if your leg muscles are strong enough to withstand the stress that tennis places upon them. So make time to train your leg muscles. Squats and lunges are particularly good exercises to make you explosive around the court.


Learning from Isaac Newton
A smooth low-to-high swing enables you to hit hard and keep the ball in the court.

INTERMEDIATE

OBJECTIVE 1: Get the right racquet for your game
As your game becomes more developed, make sure your equipment matches your style of play. Newton’s second law states that force equals mass times acceleration. In other words, you’ll hit the ball harder (with more force) if you increase either the weight or celeration of your racquet, or both. If you can swing one racquet at the same speed as a lighter one, the force will increase. This is a positive with ground strokes but a negative on volleys because heftier frames are less mobile. Racquets are also balanced differently, so keep in mind that some frames will be more head heavy than others. Additionally, we all know that playing tennis is not just about hitting the ball hard. In fact, accuracy is an even more important element in a successful game. The key is to have a racquet that’s right for your style, so seek help from an expert. If you have a chance, playtest a frame before purchasing it. And remember, a more expensive racquet is not always better.

OBJECTIVE 2: Improve your swing pattern
A technically sound swing pattern will allow you to generate racquet-head speed, and swinging from low to high on your ground strokes will help you generate topspin. This, in turn, helps keep your shots in even though you’re accelerating the racquet. Depending on the situation, you can fl atten out your strokes, such as on down-the-line passing shots, or add more topspin to hit the little dipper (a short crosscourt shot). Whatever shot you hit, the key is to accelerate the racquet through contact and not to hold up on your swing by shortening your follow-through. A coach can help you understand the best swing pattern for each situation.

Learning from Isaac Newton
Bending your knees on your serve helps get your hitting shoulder higher.
ADVANCED

OBJECTIVE 1: Use your legs when serving
Although on the surface it looks as if the arm does all the work while you’re serving, advanced players know how to use their entire bodies, including their legs, in their serves. Newton’s third law states that for every action there is an equal and opposite reaction. When you push against the ground, the ground pushes back. This drives your racquet shoulder up and helps place the racquet in the proper position behind your back. At the same time, it stretches your muscles and stores energy like a pulled rubber band. In essence, pushing off the ground allows you to generate a more powerful serve. There are two major benefi ts to using your legs this way. One, you call upon the strongest muscle groups, your leg and upper-body muscles—instead of just your arm—to generate force. Second, you’re less likely to get injured because the stresses are being shared by these large muscle groups. Estimate how much you use your legs by noting how much your knees bend during the serve. Research has shown that most top players have an average knee bend of approximately 70 degrees.

OBJECTIVE 2: Use both arms for a one-handed backhand
We all know that using both arms is critical for a successful two-handed backhand. But did you know that the nondominant arm is also very important for a one-handed backhand? The next time you watch Justine Henin-Hardenne or Roger Federer hit one of their beautiful one-handers, pay attention to what their opposite arms do. Typically, the nondominant arm mimics what the dominant arm does but in the opposite direction. This equal and opposite motion not only helps them generate more power, it also allows them to stay balanced.

Sunday, October 22, 2006

Make the Most of Your Volleys

"Sensible technique and thoughtful strategy will turn you into a force at net."


Without question, the baseline is where today’s players conduct business. At every level, though, I still believe the easiest place to finish a point is at net. You pressure your opponents by taking time away and forcing them to pass you. Even if you’re a solid baseliner, it’s important to get to net occasionally to keep your opponent off-balance. And if you’re a frequent doubles player, solid net play is a must. Here’s how to make the volley a valuable part of your game.

BEGINNER


OBJECTIVE 1: Hold the racquet properly.

One of the most important aspects of volleying is holding the racquet so you have the same grip on both the forehand and backhand. I like to tell beginners to hold the racquet like they’re shaking hands with it. But there’s no perfect way to do it. Boris Becker used a grip that was more toward the forehand side, andPractice Keeping Your Short Swing Simple although it wasn’t textbook, it got the job done. Experiment with your grip to see what you find most comfortable for hitting volleys off either side.

OBJECTIVE 2: Keep your swings short and body composed.

When it comes to volleying, less is more. You want as little motion with your racquet and body as possible. Big swings and lots of movement lead to inconsistent results. Start with a stable base and turn your shoulders so that they’re as perpendicular to the net as possible. Your racquet should only go as far back as your shoulder turn takes it. To hit the volley, step forward and make contact out in front of you. Use a short, punching swing that’s no more than 1 to 2 feet long. The power on the volley comes from the step forward, the punch, and the pace from your opponent.


INTERMEDIATE

OBJECTIVE 1:Stay in control on tougher volleys.

The ball is going to be moving faster at this level, so you’ll be forced to cover more court. Still, you need to have control over your body. That’s why the best volleyers have great core strength (from the thighs toLearning to Hit Low Balls the midsection). This prevents them from bobbing up and down, particularly on low balls. You need to bend at your knees, not at the waist, and keep a stable upper body when hitting a low volley. Also, with the increased pace and movement of the ball, you may not have the opportunity to step into your volleys. Even so, try to get your shoulders perpendicular to the net before you swing.

OBJECTIVE 2: Use angles to finish points.

Approaching the net is an aggressive play that generally ends points quickly. The easiest way to hit a winner off a volley is to set it up first with a powerful ground stroke. Putting your opponent on the defensive will allow you to get closer to the net and give you opportunities to angle the next ball away from him. The closer you are to the net, the easier it will be to create a sharp angle. Rather than trying to volley deep into the open court, which can cause you to overhit, angle the ball away from your opponent—this forces him to cover more court. Just remember to catch the outside edge of the ball to produce an angle.


ADVANCED

OBJECTIVE 1: Pick the right moments to attack.

At this level, you need to be smart about how you construct your points at net. Make sure you hurt your opponent with an approach shot that opens up the court and then close in and cover the passing lanes. Once at net, you have to decide when to go for it. A ball around chest height is an invitation to finish theHitting a Drop Volley point. But shots from around the knees and below may call for more safety. In this case, open up your racquet face a little bit and do whatever you can to get the ball over the net and deep in the court. This will give you more time to recover and force your opponent to hit a longer passing shot. Going down the middle can be a great play in this situation; if you hit a defensive volley to one corner, you open up angles for your opponent to pass you.

OBJECTIVE 2: Use the drop volley.

The drop volley is an effective shot to use at net after you’ve driven your opponent behind the baseline. Open up the racquet face a little, soften your hand on the grip, and almost catch the ball on the strings. This helps you deflect your opponent’s shot gently over the net. The secret to a good drop volley is not how short you can hit it; it’s actually how far you can push your opponent back behind the baseline before you attempt it. By not having to hit so close to the net, you significantly increase your margin for error.